I made a shirt
December 17, 2017I made pants for me!
October 10, 2013 But they’re not as cute as CC’s. :-(I have always had trouble finding pants that fit and flatter. Unless I wear pants up on my ribs, my waist is very wide. My butt is flat and wide and my thighs are on the thin side. B5818 looked like a good basic starting point to develop a pattern that would fit me. But they’re not as cute as CC’s. :-(I have always had trouble finding pants that fit and flatter. Unless I wear pants up on my ribs, my waist is very wide. My butt is flat and wide and my thighs are on the thin side. B5818 looked like a good basic starting point to develop a pattern that would fit me.
Pattern Description: Pattern Sizing: Did it look like the photo/drawing on the pattern envelope once you were done sewing with it? Were the instructions easy to follow? What did you particularly like or dislike about the pattern? Fabric Used: Pattern alterations or any design changes you made: For design and construction: I decided the cut-on fly wouldn’t work in this thick wool so I used the fly pattern and instructions from Vogue 1059. I also used the pockets pattern and the rear welt-pockets from there. (I placed the back pockets too low, however.) I added twill tape to the front pocket edge and followed Lorna Knight’s pocket instructions. I also added twill tape in the waistband and stitched-in-the-ditch instead of slip-stitching the facing. I flat-felled the crotch and inseam by machine, hand flat-felled and then edgestitched the outseam. The biggest change I made was adding a full lining. Would you sew it again? Would you recommend it to others? Conclusion: |
I made pants!
September 25, 2013I wanted try my hand at pants, CC was a willing guinea pig, Joann’s had some linen-cotton blend on sale, Vogue had a pattern sale, and voila!
Front
Back
Side
fly-front!
welt pockets!
Here’s my review for PatternReview:
My friend loooves wide-legged pants and I wanted to make her a pair. So when I saw this pattern and found some linen/cotton fabric on sale, it had to be!
Pattern Description:
Vogue 1059 Flared pants with yoke. View A plus the front pockets from View B.
Pattern Sizing:
I made these for a friend whose measurements are waist 28 and hip 40. Going by the chart that should’ve been a size 16 but I took a wild guess and cut a size 10. It fit almost perfectly–or at any rate the way she wanted it to fit. The waist needed a little adjusting; I had to take it in a smidge at the center back and let it out a little at the side seams.
Did it look like the photo/drawing on the pattern envelope once you were done sewing with it?
Yes! Better!
Were the instructions easy to follow?
Yes. This was my first time making a fly or welt pockets. Somewhat mystifying but I followed along and they came out well.
What did you particularly like or dislike about the pattern?
This was the right pattern with the right fabric for my friend’s figure and taste.
Fabric Used:
Linen cotton blend.
Pattern alterations or any design changes you made:
I made View A but added the front pockets from View B. The pocket openings ended up really small so if I did that again I would rethink my strategy. I also made the fly a couple inches longer. As it’s drafted it’s not much more than two inches long which looks really stupid to me, especially since the notions list has a 7 inch zipper. (Why do all pants patterns call for 7 inch zippers and then have you cut it down to 4? Why not just have you buy a 4 inch zipper?) I also strengthened the waist with a bit of twill tape at the seam.
Would you sew it again? Would you recommend it to others?
Yes! Since we know this pattern fits my friend, we’re already planning on more pairs. I recommend it to anyone who likes that style.
Book Review: Fashion Sewing For Everyone
September 7, 2013Fashion Sewing For Everyone
Adele P. Margolis
New York: Doubleday, 1974
When my local studio let me borrow this book, I was pretty excited. It had the hard cover, heft, and line drawings of my mom’s Joy of Cooking (1975). Maybe it would have the same usefulness and charm. Or of The Joy of Sex (1972). Well…sorta but not quite.
Practical usefulness:
Almost every sewing technique a home sewer might need is in here. How to stitch a corner, insert a zipper, restore the grain of a fabric, make a shoulder pad, manipulate darts, lay out a pattern, and much much more. A quarter of the book is devoted to fairly advanced tailoring techniques. That section is a great resource. And if this book doesn’t cover what you’re looking for, the author helpfully (shamelessly) directs you to her other books, “Design Your Own Dress Patterns” and “How to Make Clothes That Fit and Flatter”.
However. Even though the info you need is in here, you might not be able to find it. I could not figure out the organizational scheme of this book. It neither advances from basic to skilled, nor divides into logical reference categories. It jumps right into darts, zippers, facings, and ruffles (!) before talking about seams and hems. Seam finishes are explained in the chapter on hems but french seams are in the chapter on sheer fabrics and flat-fell seams in the chapter on lining tailored garments. Also, this book is awfully wordy and the illustrations aren’t that helpful. I doubt everyone can follow instructions like this.
Historical interest:
1974 is in that less interesting zone between the really vintage and the contemporary. I was two years old. Watergate happened. And ABBA. You could, apparently, find hair canvas at your local fabric store. Most home sewing machines could only do a straight stitch. No sergers in sight. But women can wear pants and “boys can borrow from us our fancy fabrics and our frills.” (p. 184) Fusible interfacings and synthetic fabrics are all the rage. If only the book included a pattern for an ABBA jumpsuit…
Conclusion:
The best parts of this book are Margolis’ encouraging attitude and disregard for hard and fast rules, even as she explains the traditional methods. “Anything goes—if it works!”
Margolis seems to have been a grand lady and Massachusetts local. For a charming obituary see http://jwa.org/weremember/margolis-adele
I’m back
August 27, 2013I want to make a suit.
With wild patterns.
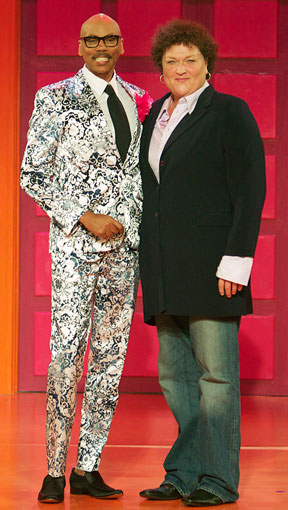
My first inspiration was the ever fabulous RuPaul.
When not in drag, he maintains his fabulosity with his suits.
Then the Fall 2012 women’s fashions showed a lot of patterned suits.
Some graphic.
Some floral.
Then this happened:
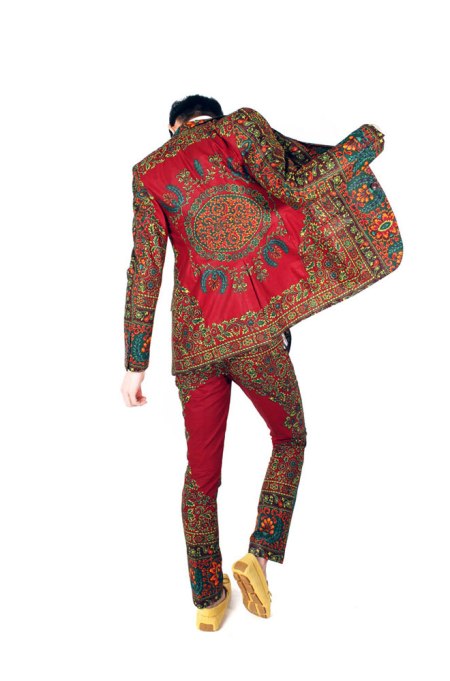
Robert Sheehan wore Dent de Man.
http://www.dentdeman.com/lookbook.html
I think I could rock that look.
Next time I’ll write about patterns: sewing patterns and fabric patterns.
Does anyone out there sew men’s patterns for a woman’s body? Or is Peter at http://malepatternboldness.blogspot.com the only one who does cross-gender sewing?
Hand-cranks
February 24, 2013In my last post I mentioned that I grew up sewing on a hand-crank straight-stitch machine. My mom’s machine was a Singer like one of these:

These are still the standard home-use model in Pakistan, with a wooden base so they can be used by someone sitting on the floor. Sewing machines are a valuable possession in Pakistan and often an important way for a woman to earn an income. They are so ubiquitous that the English word “machine” by itself can only mean a sewing machine. Singers were the best but they had competition from local brands and from brands from China, Korea, and Japan. Here are some competitors:
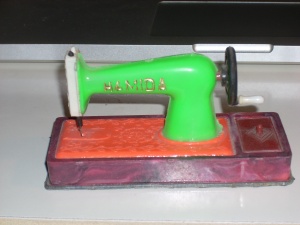
One of my prized possessions is this miniature plastic toy sewing machine:
If you turn the wheel, the needle goes up and down! And the lid on the side compartment is removable.
Eventually my mother got tired of the hand-crank and paid 160 Rupees to have a belt and motor put on. Like this lady’s:
But I was always a little terrified of the speed of the electric-powered needle. I’m still a bit scared when my machine starts galloping away at a swift pace!
I got zig-zag! Or how to fix a vintage sewing machine by dropping pieces on the floor.
February 24, 2013I’ve had this machine since I was a teenager in the ’80s. A neighbor gave it to me and I have no idea where she got it. For the next couple decades I hauled it with me through college and graduate school, to Canada and back, through a marriage and a divorce. I think it was my heaviest single belonging until I bought a car.
 (The cover still has a sticker from college dorm storage.)
But I didn’t really know what I had. It could straight stitch with some moaning and grumbling but the selectors knobs on the front were non-functional and all the possibilities described in the manual seemed like absurd fantasies. I never got around to either getting it serviced or buying a new one. I grew up hand-sewing and using a third-world hand-crank straight-stitch only machine. So I made do.
I didn’t know old the machine was. I didn’t know anything about it, except that it was awfully heavy and the table was handy as extra furniture. Then a couple years ago when I was visiting my mother, her boyfriend came home from his home-remodelling job with a scrap of newspaper he had found inside a wall. It was dated 1959. He brought it home to show us a news article but I immediately noticed the ad: Singer Slant-O-Matic 401, The Greatest Sewing Machine Ever Made. I owned an antique! You probably knew that already.
I looked online. I discovered that this machine was much loved, ubiquitous, and apparently indestructible. It was, in the words of the woman at the sewing studio down the road, the Honda Accord of sewing machines. So I took out my screwdriver and fiddled with those selector knobs until they sat right. I read the manual and found the section on maintenance. I opened the top. I opened the bottom. I cleaned with q-tips and rags. I bought a bottle of oil at Joann’s and oiled everything. Joann’s had no lubricant but the experts online said I could use petroleum jelly. It ran smoother. I made a couple shirts. I made the dress in the last post. I discovered Sew-Classic and bought another foot, some bobbins, and lubricant. I downloaded a repair manual.
But…the selector knobs were still reluctant to do much. They shifted reluctantly through the cams. If I tried to zig to the left, the needle would shift but would get stuck going down. If I tried to zag to the right, the needle stayed in the center. This week I took my courage in both hands and tried to follow the various steps in the repair manual for checking and removing and replacing things. I took things apart not knowing if I could put them back again. Nothing seemed to make much difference.
Today I tackled the needle bar. I thought that perhaps the problem lay with the “bushings” that clutched it at both ends. I loosened the screw on the armature that held it and pulled it out. But the “bushings” baffled me and I wasn’t able to do much there. So I tried to put the needle bar back. It wouldn’t go. The armature had spun loosely around. I tried to fiddle with it. It came tumbling out of the machine, split into two little pieces and rolled under my desk! Ack! My worst nightmare!
I managed to find the two pieces and began to put them back together when I noticed they seemed a little gunked up. Q-tip, toothpick, and screwdriver revealed a solid little chunk of lint stuffed in there. And a jagged hard point blocking the little tubes from sliding into each other. Solidified oil? Metal shaving? Dunno but it’s gone, along with the lint ball. And that is what was screwing up the zig-zag. Something I would never have found without dropping those pieces on the floor!
I made a dress!
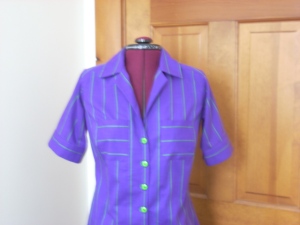
February 20, 2013Purple is my favorite color!
I made this from Egyptian cotton shirting given to me by a friend 25 years ago. This dress was a fabric hog! I matched all the stripes and I used the fabric for the facing and interfacing. Fortunately I had quite a few yards to play with. I had used some of it for a wrap skirt but since that no longer fit I took it apart and used those pieces too.
I spent a LOT of time on fitting and pattern making. I started with this NewLook shirt pattern but made it much more fitted by raising the armscye, lowering the bust point, squaring the shoulders, redrafting the sleeves, deepening and lengthening the back darts, and taking in the side seams. I may have overdone it; the armscye is a little too high and the shoulder is a little too narrow. But the bust fits perfectly. I added a facing to the back yoke but then couldn’t figure out how to attach that neatly to the front notch-collar facing. Hand stitching work around. There is no waist seam and no front waist darts. I was worried that just curving out to an A-line skirt wouldn’t work but it did! Probably only because I have a small bust and a wide waist.
Trying to match all the stripes was a pain, especially since each the fabric had a terrible propensity to stretch or slip when sewing. I’m not sure whether to blame my machine or the fabric. But almost every seam had to be unpicked and re-sewn before it was right.


